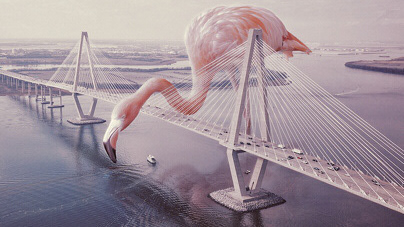
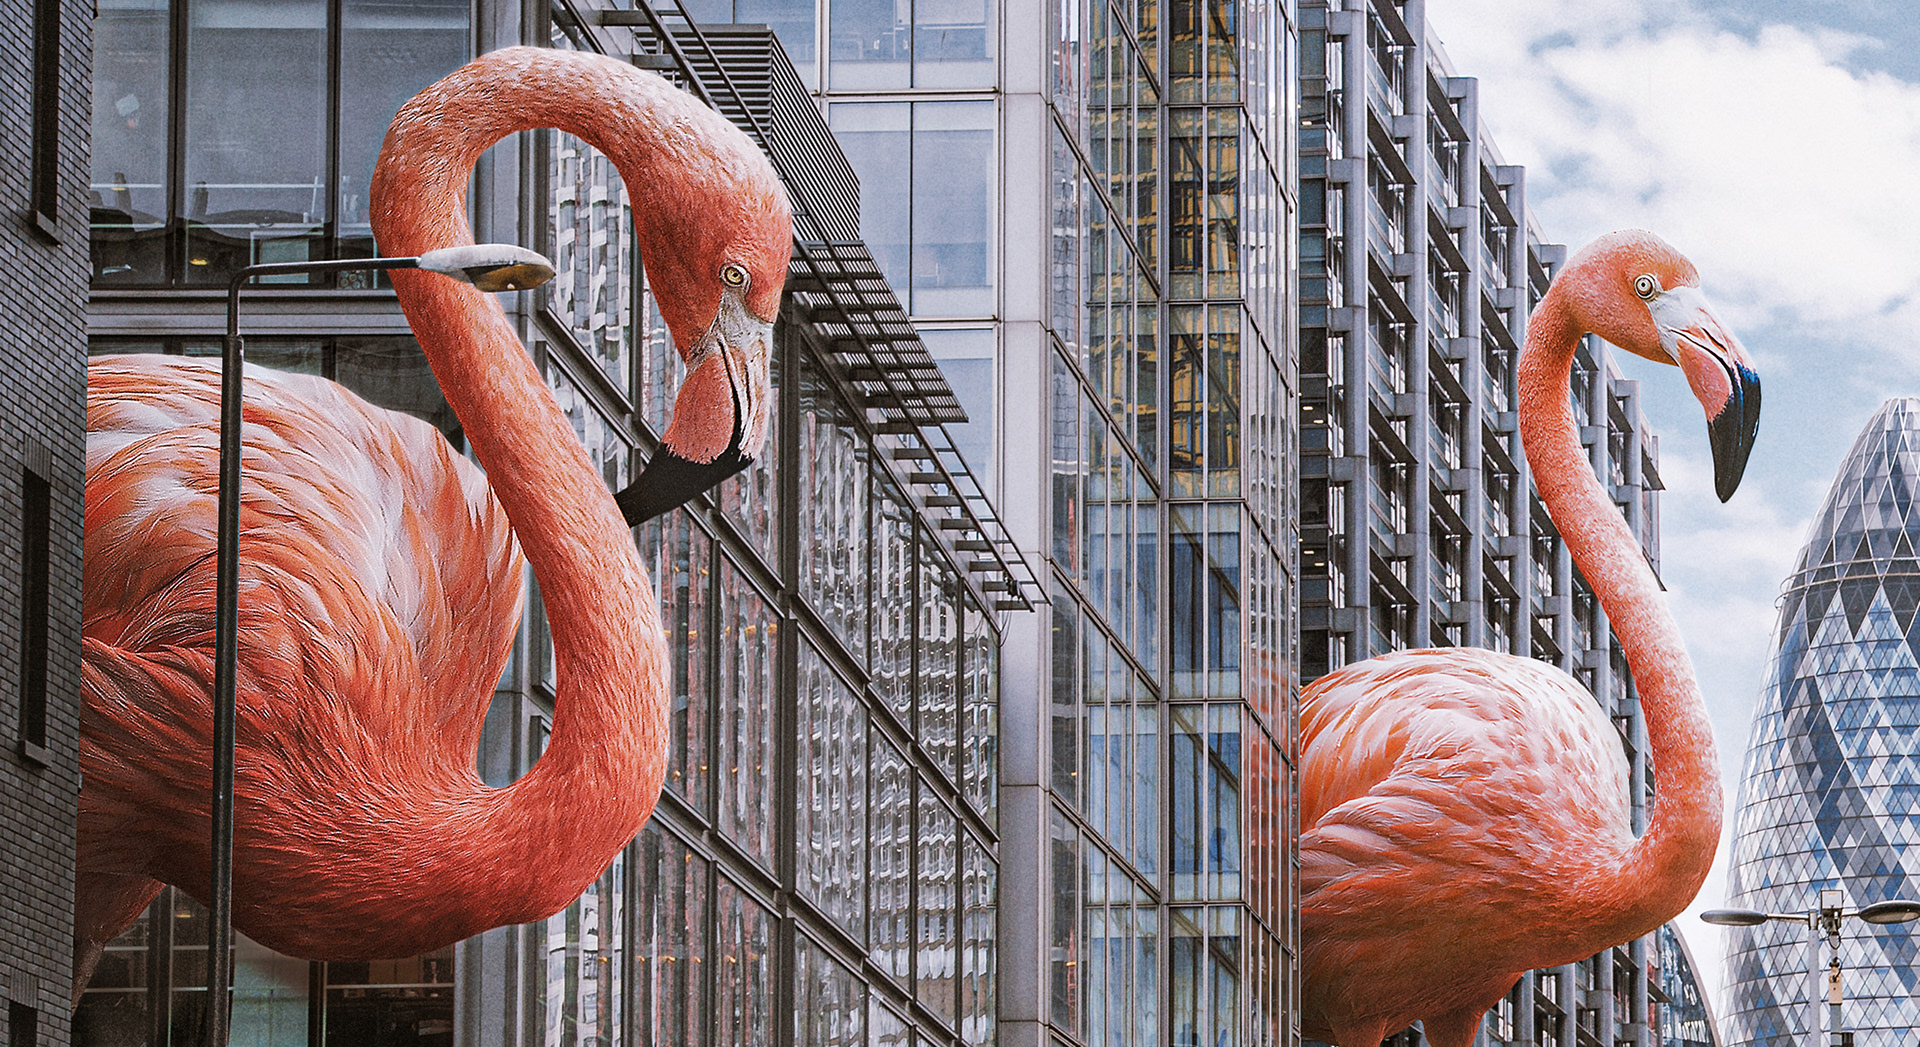
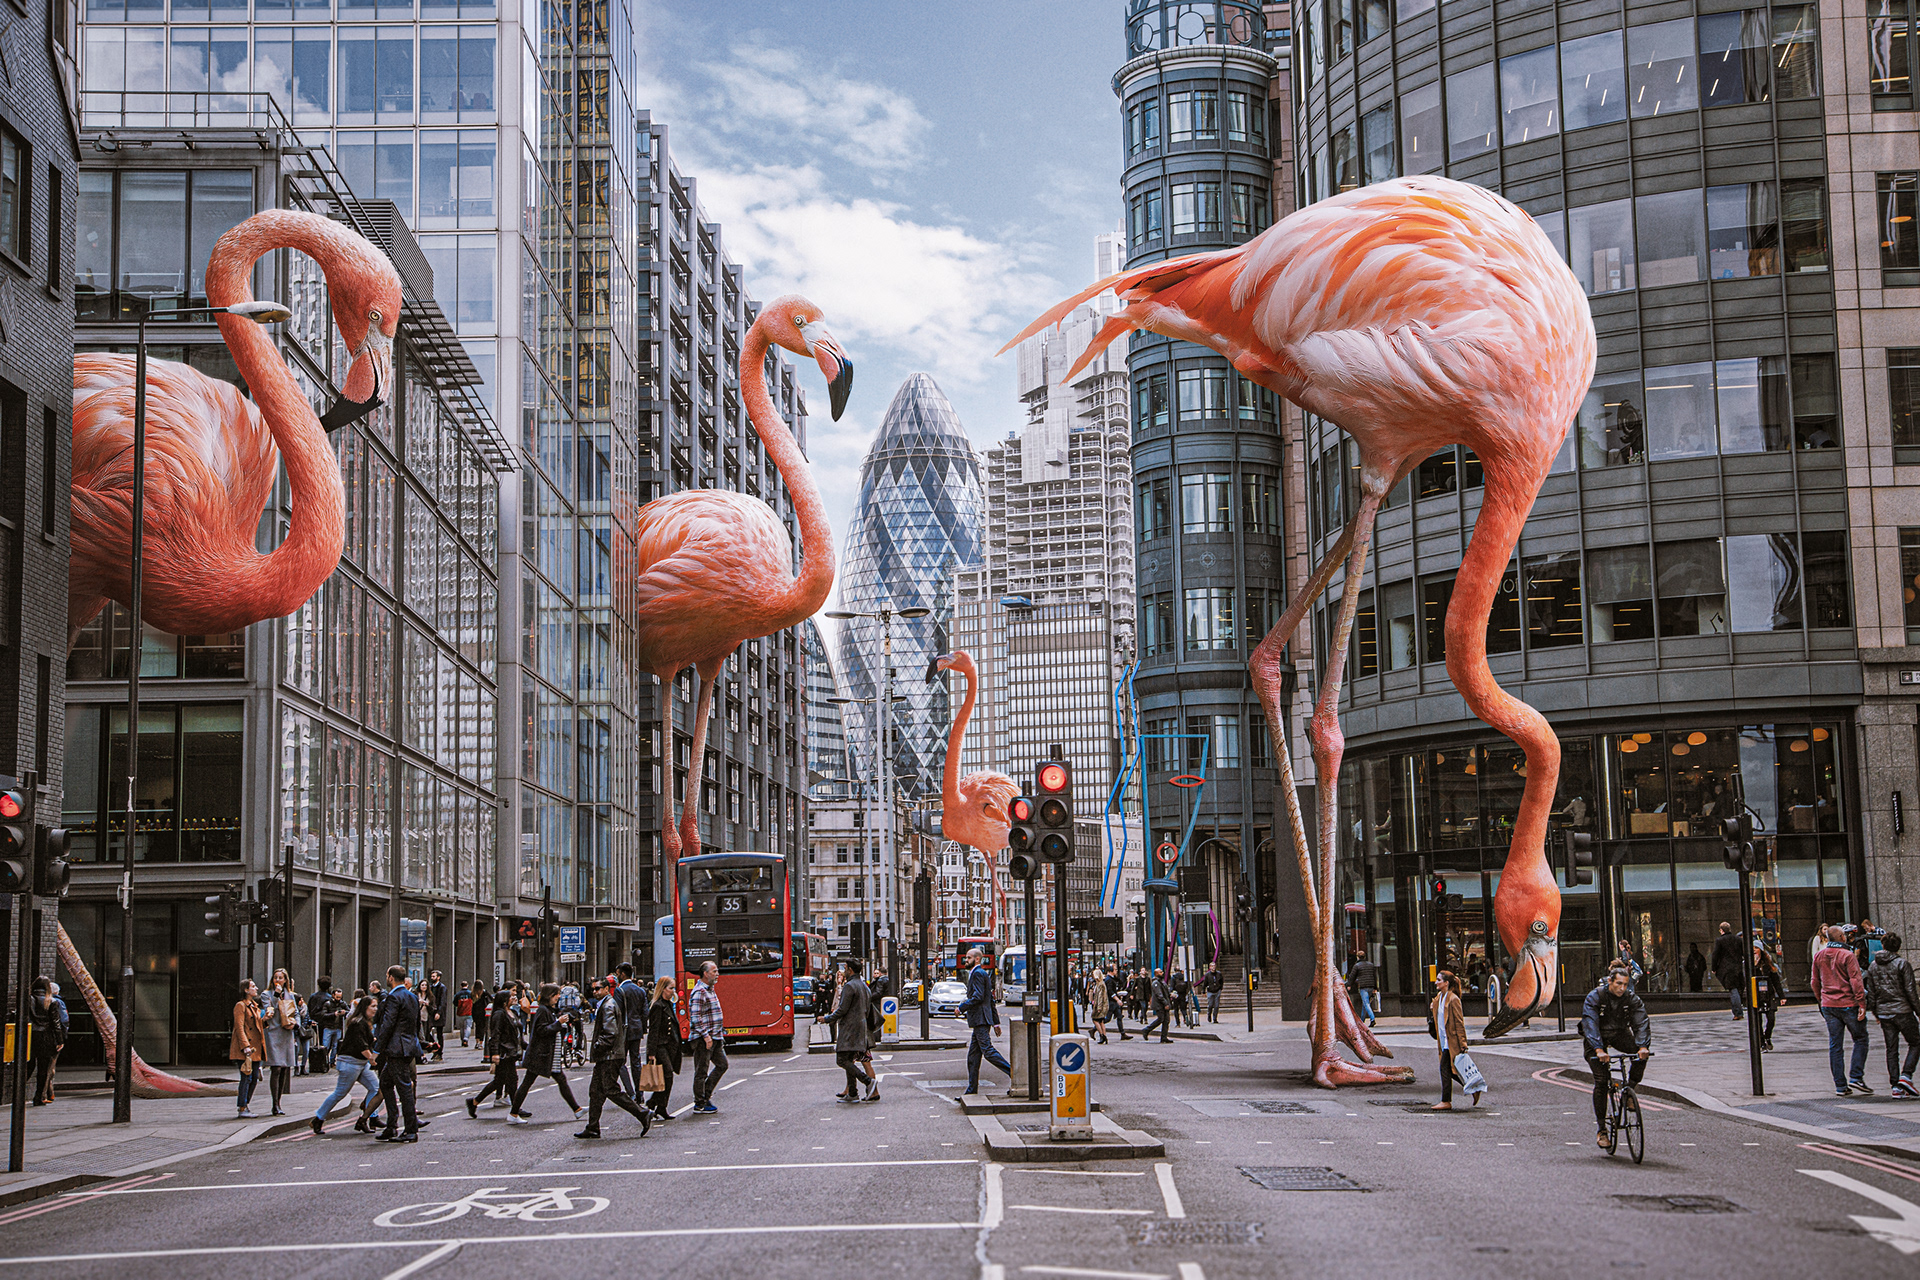
Adobe Creative Cloud® / Flamingos Photo Composite
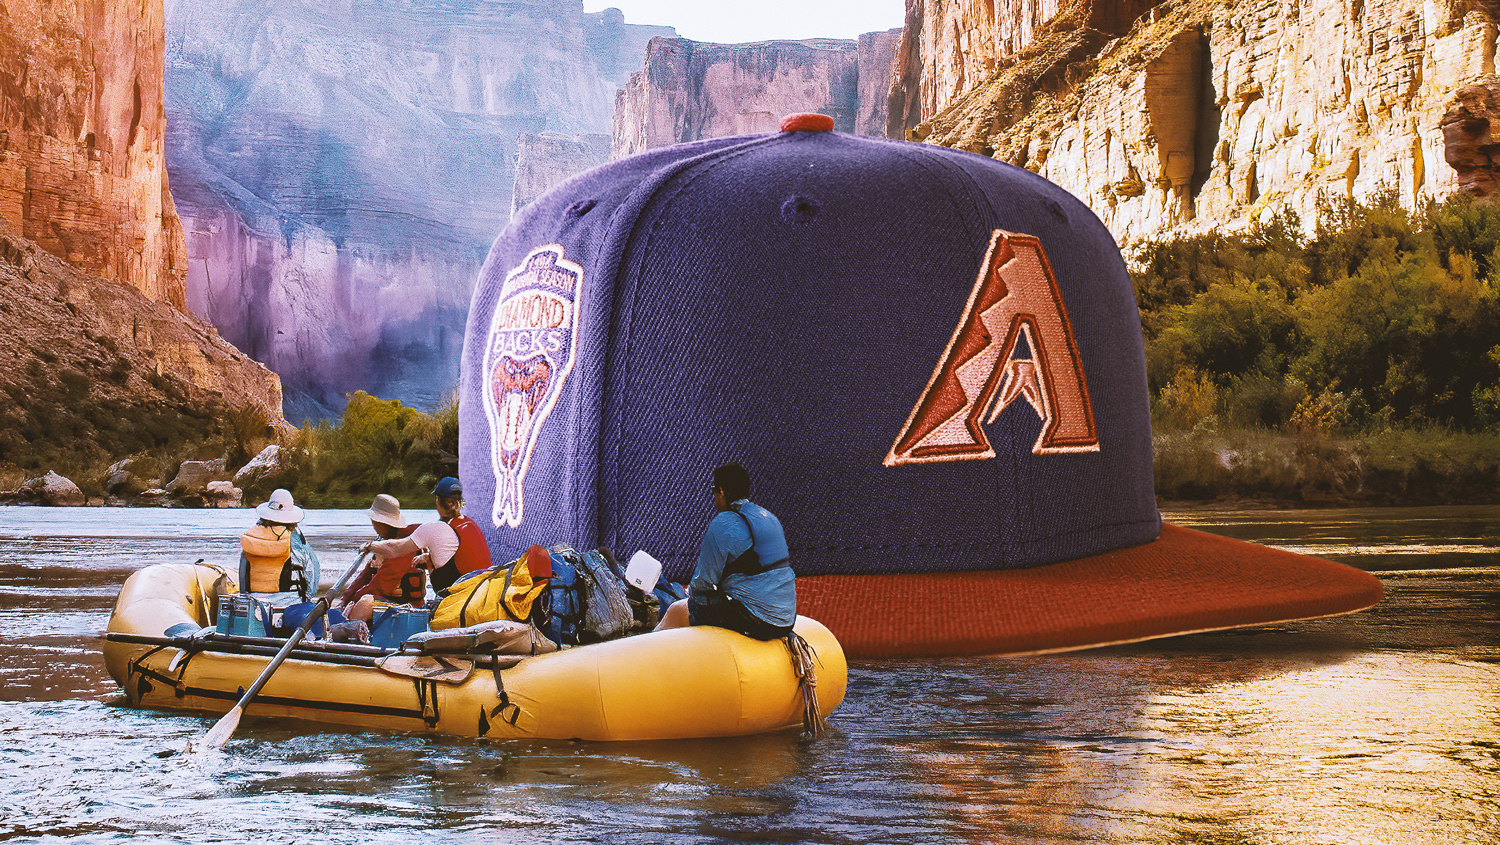
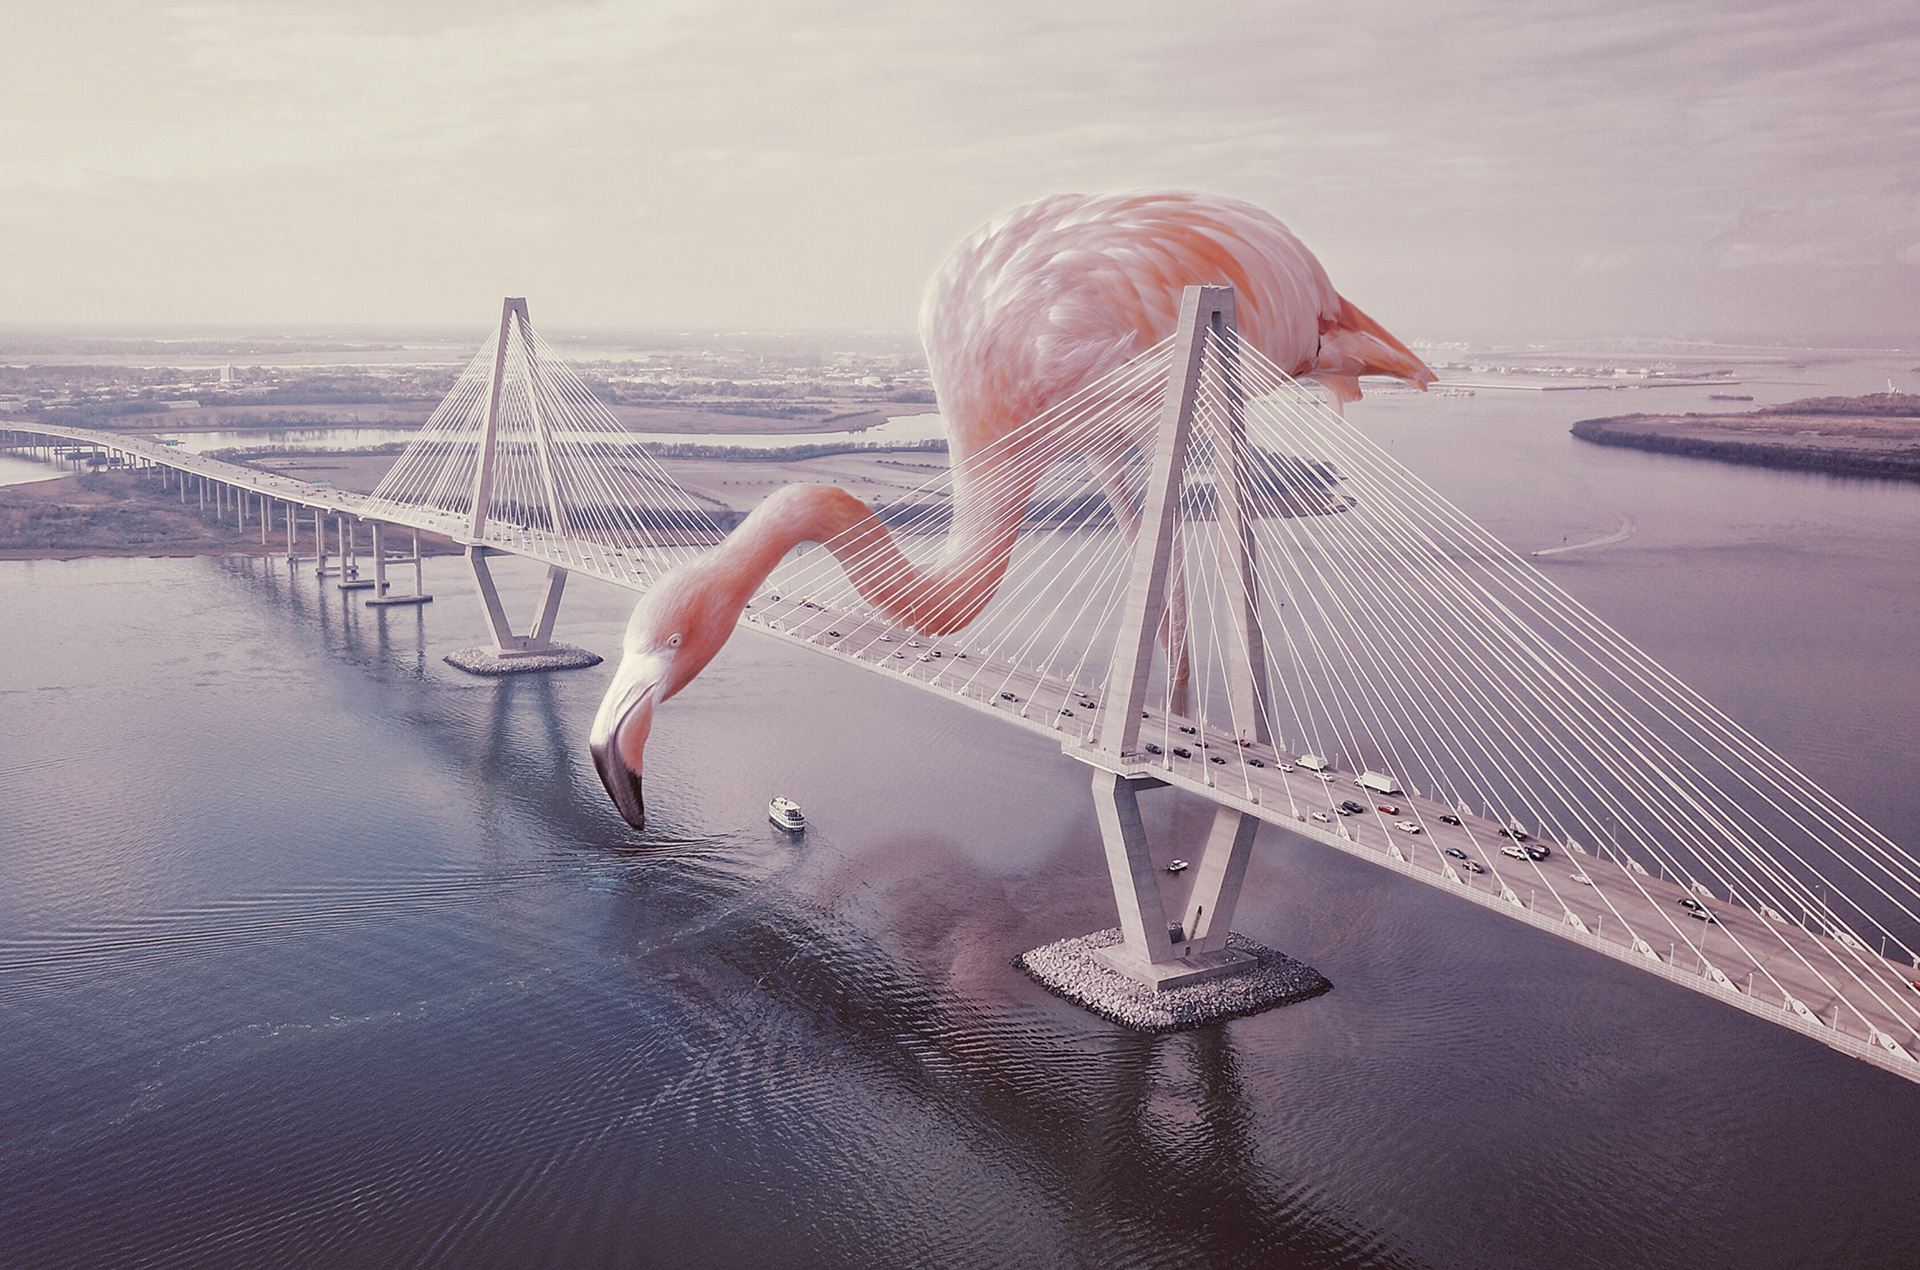
I partnered with Adobe® to create an artwork they could use for an online tutorial showcasing a specific tool within Adobe Photoshop®. Back in early 2019 I made a photo composite of a giant flamingo next to a bridge ( see below or check out the entire series HERE ) and they wanted me to do something similar using giant flamingos as well but in a busy city environment. They wanted to portrait a tropical vibe taking over the city and these giant exotic birds worked really well for that purpose.
As you can expect, all assets used to create this image were sourced from Adobe Stock®; since they own the platform I was able to use any image I wanted which is great, but the important thing about doing retouching and photo composite is to use the RIGHT images, so finding the right assets was a bit difficult in a couple of cases. One of the flamingos was hard to find in the right perspective with the right light direction. The trick with Adobe Stock® I have learned is to search for images in different languages. Once you have gone through all the viable options using English keywords, you can use Spanish keywords and you will get extra options. This makes sense since many of the photographers who contribute to the platform they index their work using keywords from their native tongue. So there is a tip for you! Translate your keywords to different languages and you will get extra options for stock photography. You are welcome!
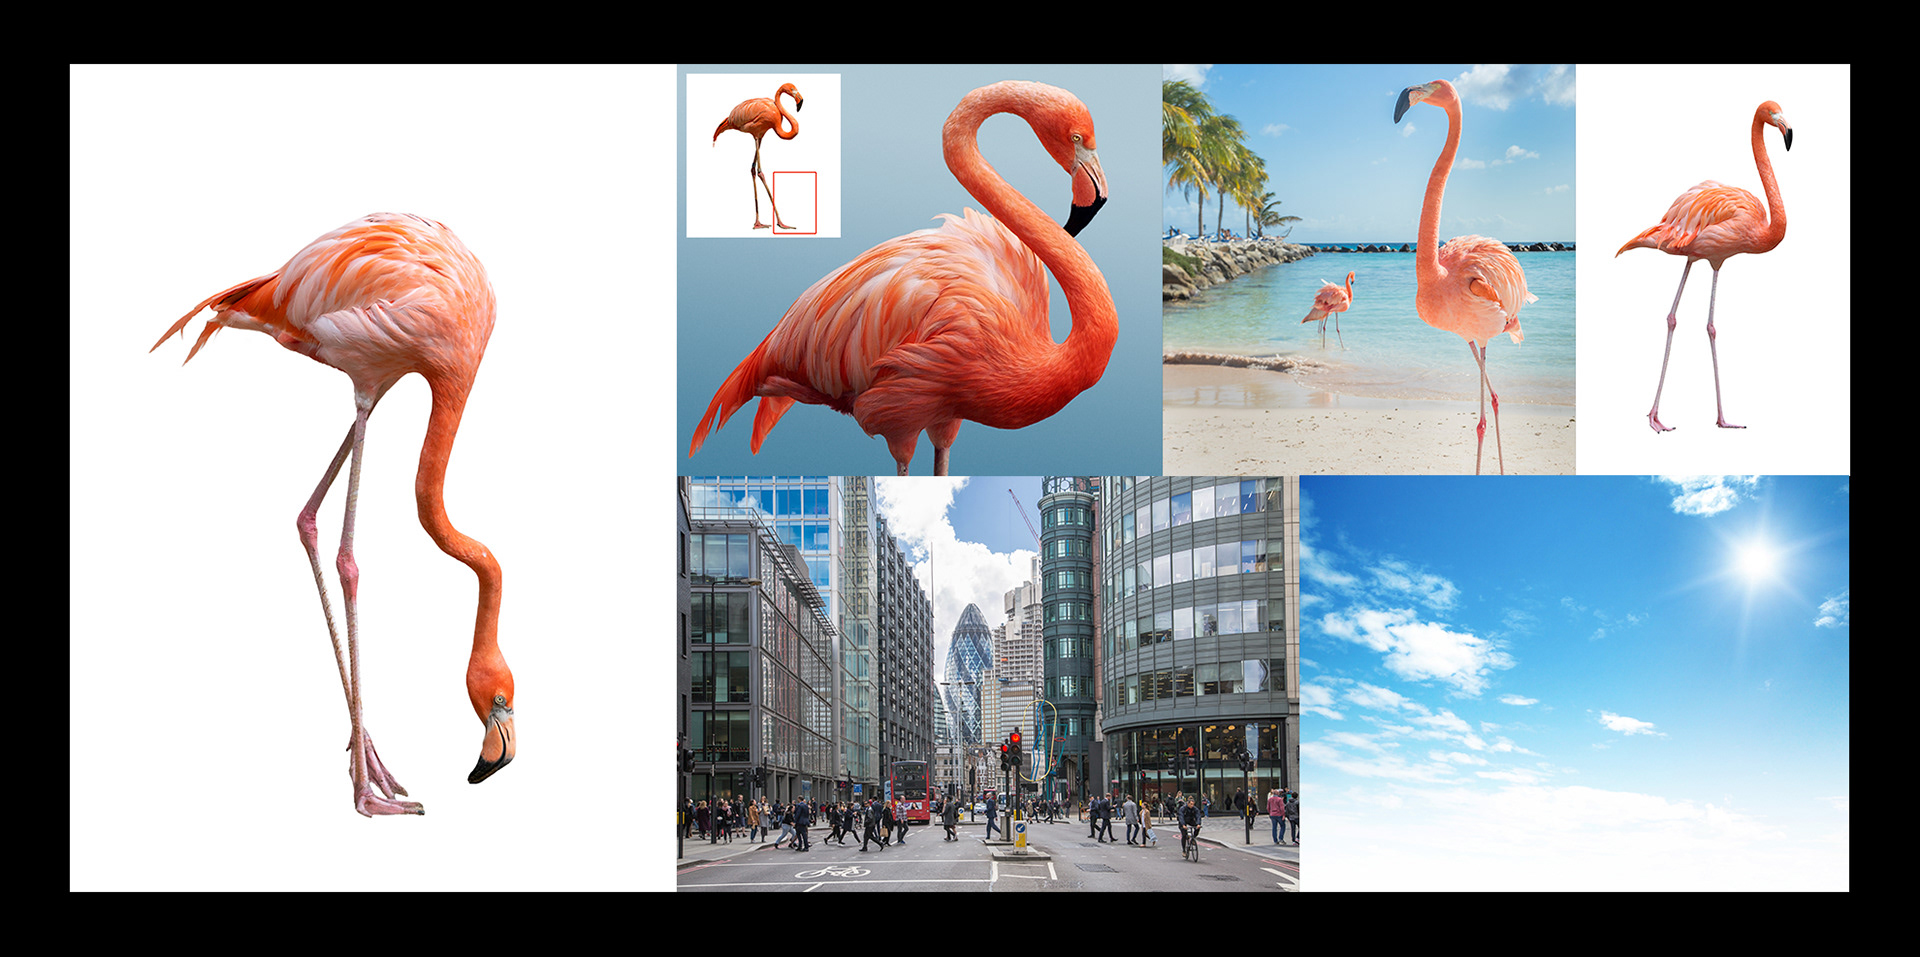
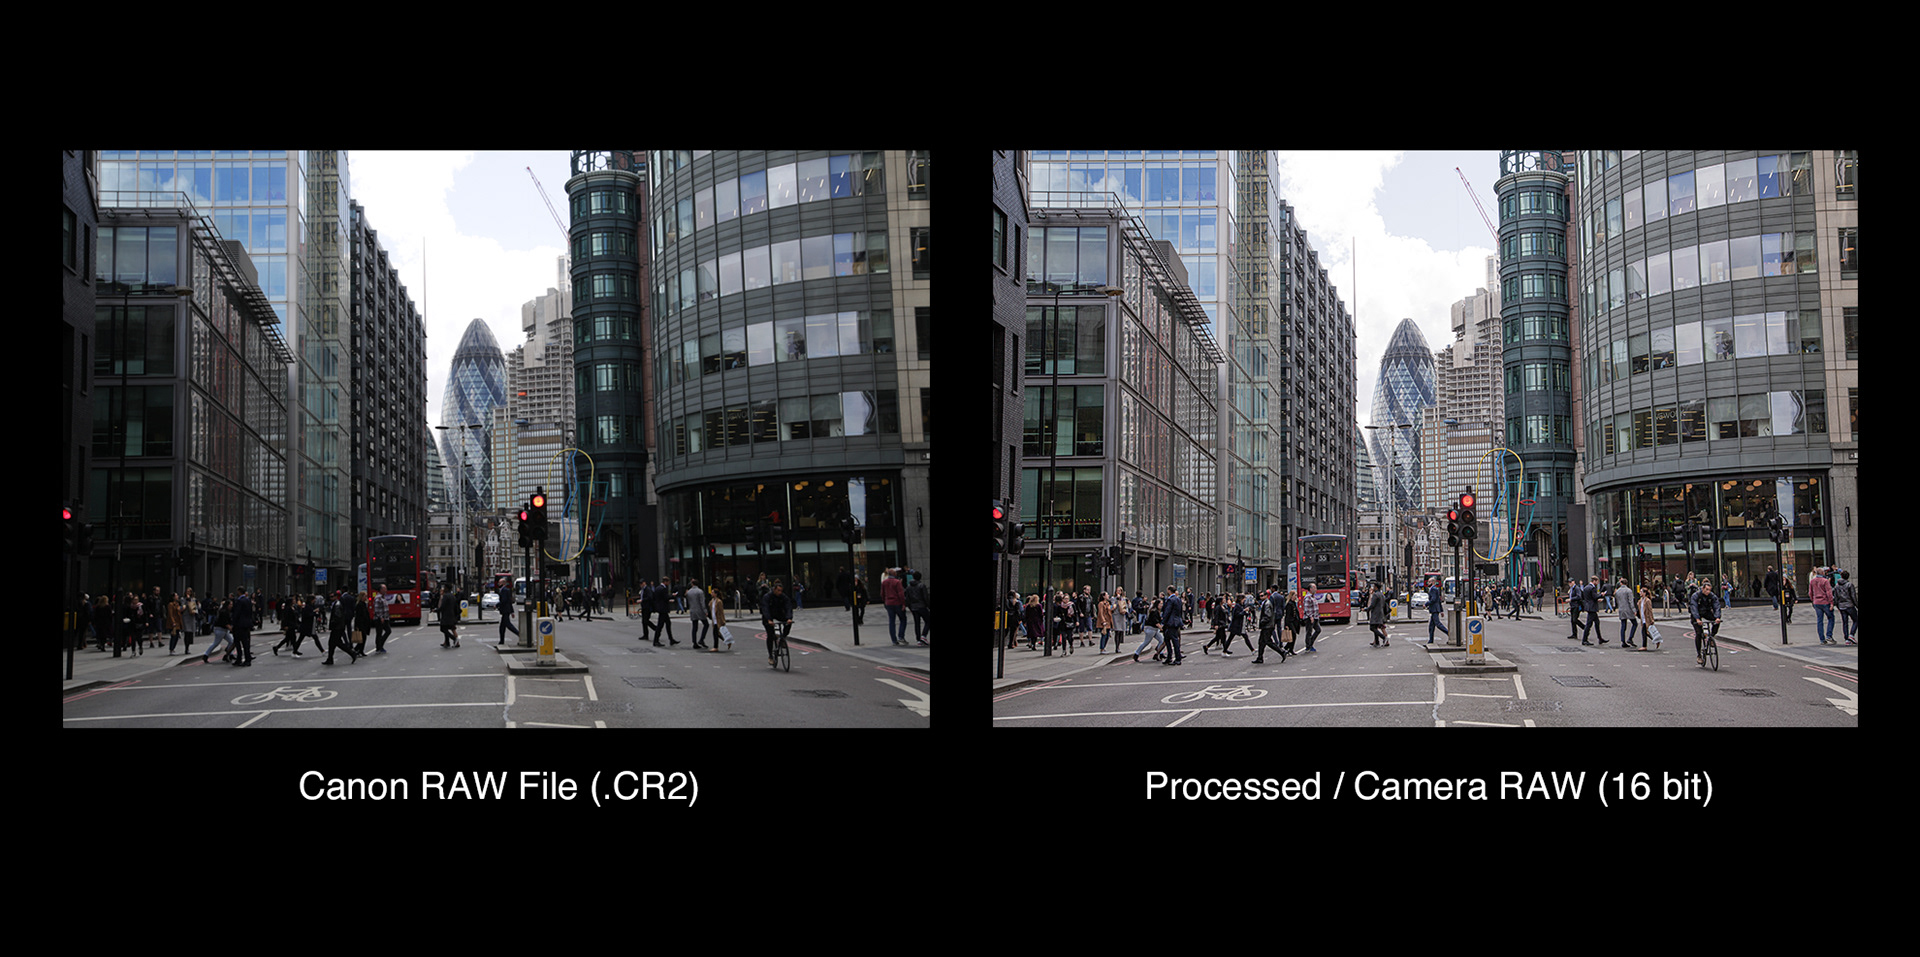
Another cool thing about working directly for Adobe® is that they can contact the photographer for each stock image and buy the RAW file of any image if available. This is awesome! In this case we were able to secure the RAW file of background image of London. This allowed me to process it in Camera RAW and start with a nice neutral color grading with very little contrast and also to work the image full resolution and size in 16bit. The Photoshop file .PSB ended up being huge (3.72Gb) but my computer can handle it with ease and it was nice to work with all that extra color and texture information and not compressed JPG files from regular stock photos.
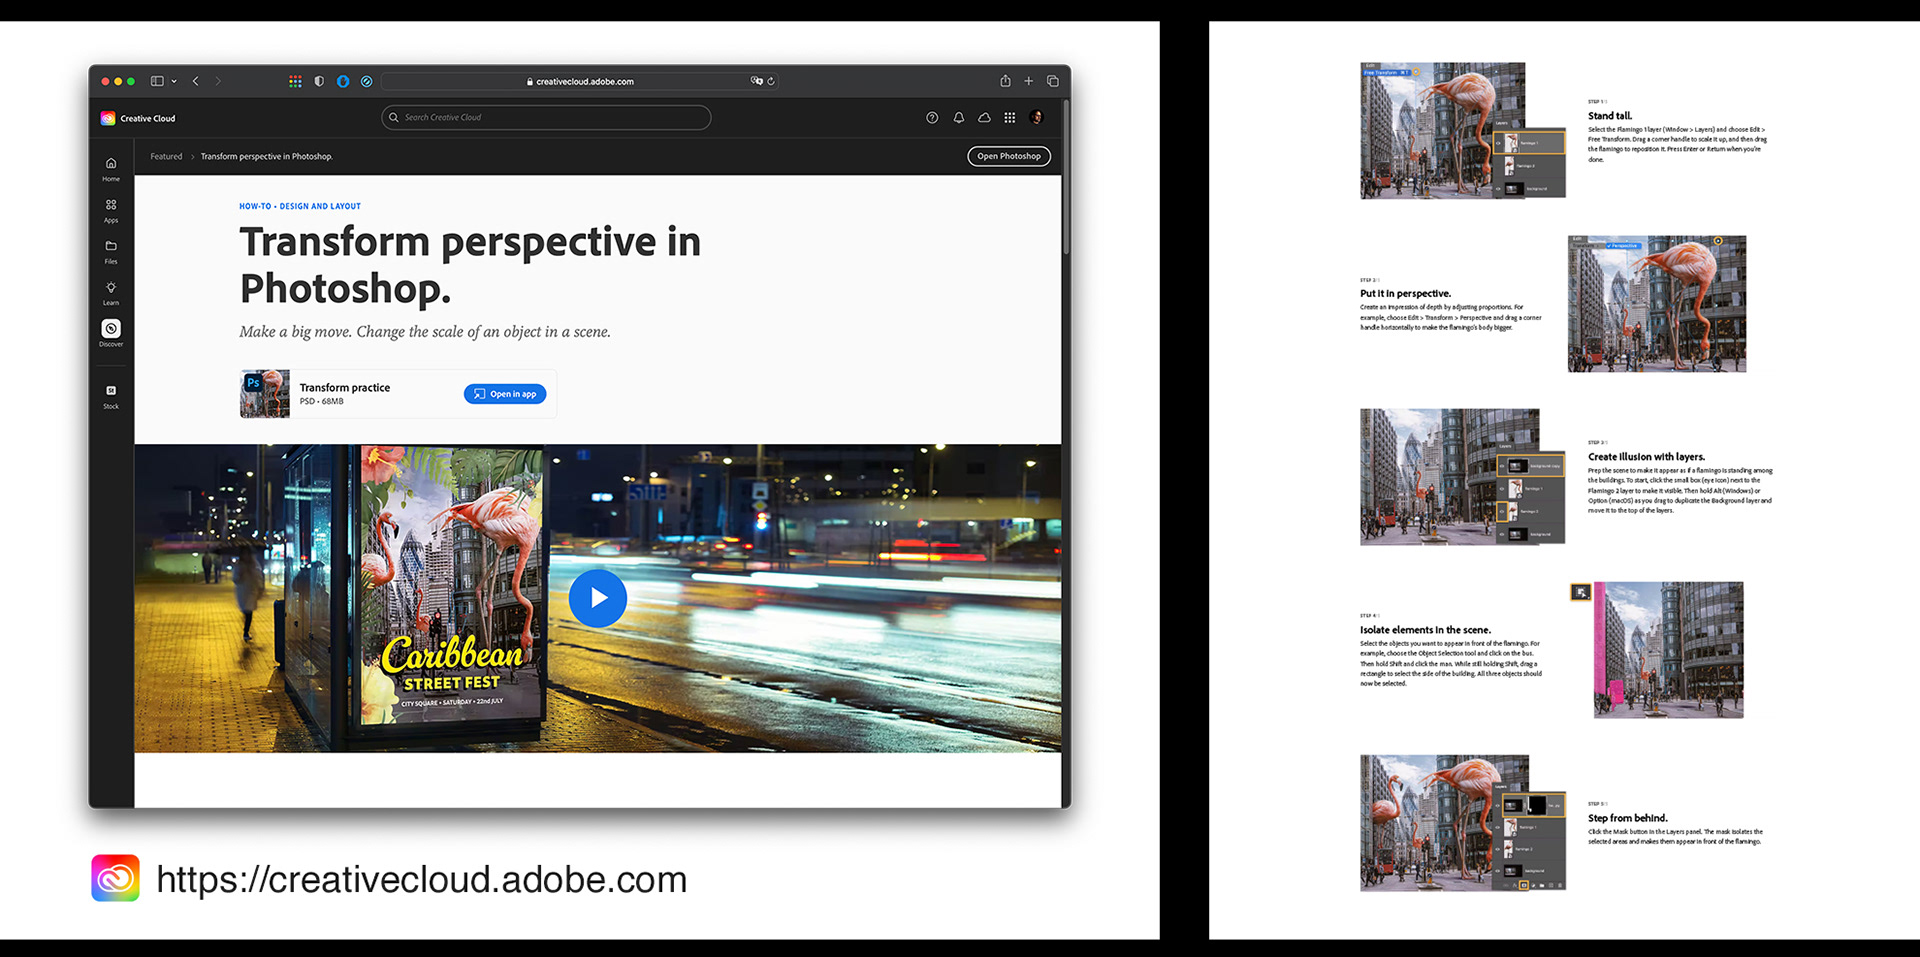
The entire retouching and photo composite process was done using Adobe Photoshop®, not the public Beta with Generative Fill, but the mainstream one without the Remove Tool. The Beta version wasn’t available when I was working this project and the Remove Tool would have been super helpful, but I am used to working the old fashion way so no big deal. Here is a layer breakdown of the composite process so you can see a summary of all the work involved in the creation this image.
The final artwork was used for a tutorial which is live inside the Creative Cloud® app and website. The tutorial is not a step by step on how to create this artwork but a way to show you how to efficiently use Photoshop's Transform Perspective tool and the Object Selection tool. You can check it out right HERE
This artwork belongs entirely to Adobe® now. They own all the rights to it. I am only able to use it for portfolio purposes which is why you can see it here. If you liked this retouching and photo composite project you can check some of my other projects, you might find something else you like.
You can also follow me on Instagram® and Threads® @cejimenez